


Keep your eyes on this complete guide to know the steps to offload WP media to Cloudflare R2.
At the end of reading this blog, you will learn about why you should use this storage to offload your WordPress media efficiently. You’ll also learn the easiest way to offload WP media to Cloudflare R2 storage step-by-step.
Hope this blog will help you with the details about offloading WP media files to Cloudflare R2 faster than you think. Also, we’ll discuss how to setup Cloudflare with Amazon S3 in WordPress to offload media files.
Let’s get started.
Advantages of Offloading WordPress Media Files to Cloudflare R2
Cloudflare R2 is an S3-compatible storage of Cloudflare Content Delivery Network (CDN) that caches your WordPress site’s media content or files on its server. Integrating Cloudflare R2 storage with WordPress provides significant benefits in terms of performance optimization, security enhancement, etc. It helps you deliver a fast, secure, and reliable experience to your site visitors.
Integrating Cloudflare R2 with WordPress sites offers several benefits. Below are some advantages of using Cloudflare R2 to offload your WordPress media files.
- Offloading WP media files with Cloudflare R2 helps to improve website performance. This improves loading times for visitors, especially those located far from your site’s origin server.
- Cloudflare R2 offers protection against Distributed Denial of Service (DDoS) attacks. It can protect your site from large-scale attacks before they reach your WordPress site
- Cloudflare’s WAF helps protect your WordPress site against common online threats, such as SQL injection, cross-site scripting (XSS), and malicious bot traffic.
- Cloudflare R2 services support easy ways to integrate and manage.
- It is cost-effective and available from a single unified interface.
How to Offload WordPress Media Files to Cloudflare R2 Easily (Step-by-step)
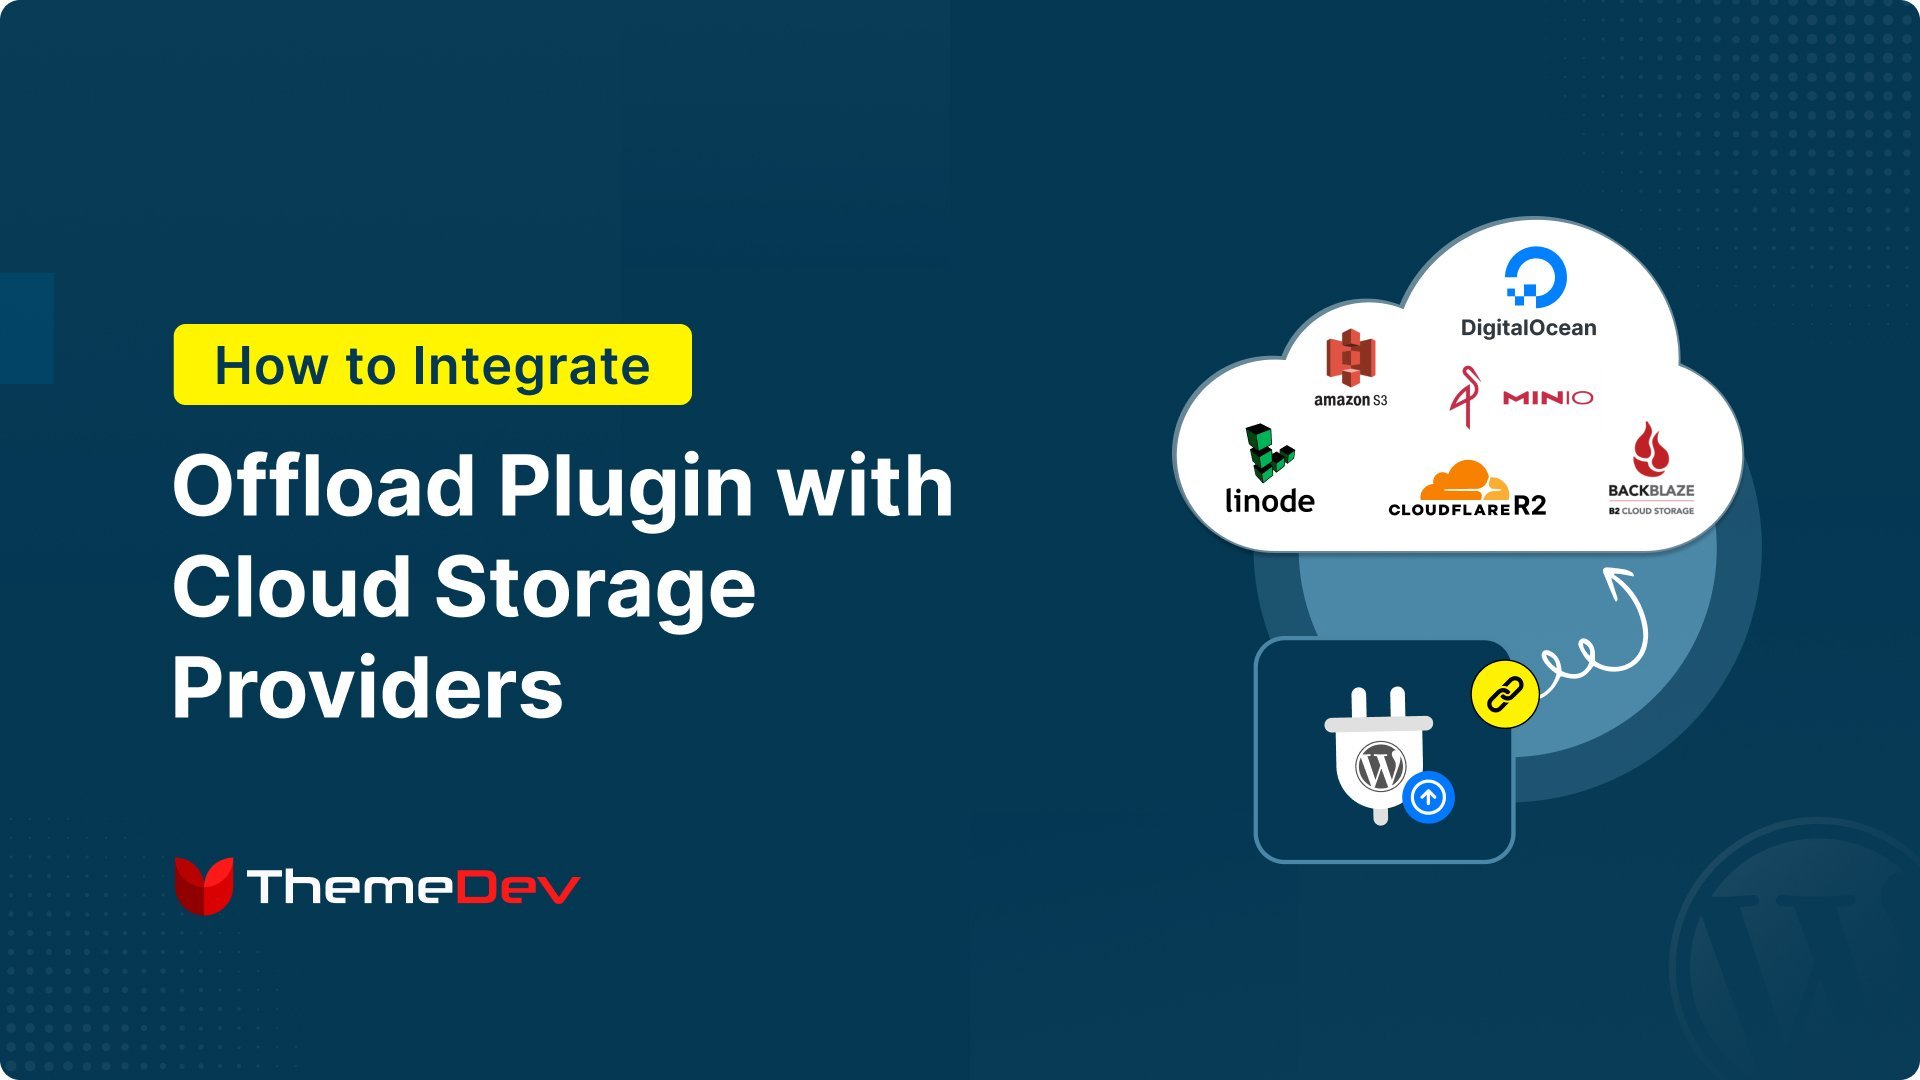
To integrate Cloudflare R2 with WordPress sites, you can use a plugin called Next3 Offload. It allows you to offload your media files to Cloudflare R2 Cloud Storage effortlessly. Using Next3 Offload you can also connect your WordPress site with Wasabi, Bunny CDN, DigitalOcean, Amazon S3, and S3 Object Storage (CloudFront, MiniO, IDrive e2, and StackPath)
You need to follow the steps below to use Cloudflare R2 Cloud Storage provider with your WordPress website.
Step #1: Install And Activate Next3 Offload
To integrate your WordPress media files with Cloudflare R2, first, you need to get Next3 Offload from its official page and then install and activate it on your WordPress website.
First, log in to your WordPress admin dashboard. Then, go to the Plugins section.

Then click on the Add New Plugin button.

Now, navigate to the Upload Plugin option.

At this point, click on the Choose File option. Upload the Next3 Offload plugin here.

Navigate to the Install Now button (Here is the complete installation process).

Then, you need to activate the plugin.

Now, to access the plugin, you need to activate the license. Insert your collected license key in the field.
Click on the Activate License button.

After following the above process, you can access the Next3 Offload dashboard and all the features of this plugin.
Step #2: Logging in to The Cloudflare R2
To connect your website with Cloudflare R2 and offload your WordPress media library to it, you need to create your account. If you have an existing account then you can log in to your account.

To complete the signup process you need to provide your email address and password.

Then hit the Sign up button.

Step #3: Add a website
You have successfully completed the account creation process. Now click on Add a website or application button to go ahead.

Provide your site’s domain name and click on the Continue button.

In the first phase, you have to go to the Continue button after choosing a plan.

In this second phase, you can see the DNS records.

Then click on the Continue button.
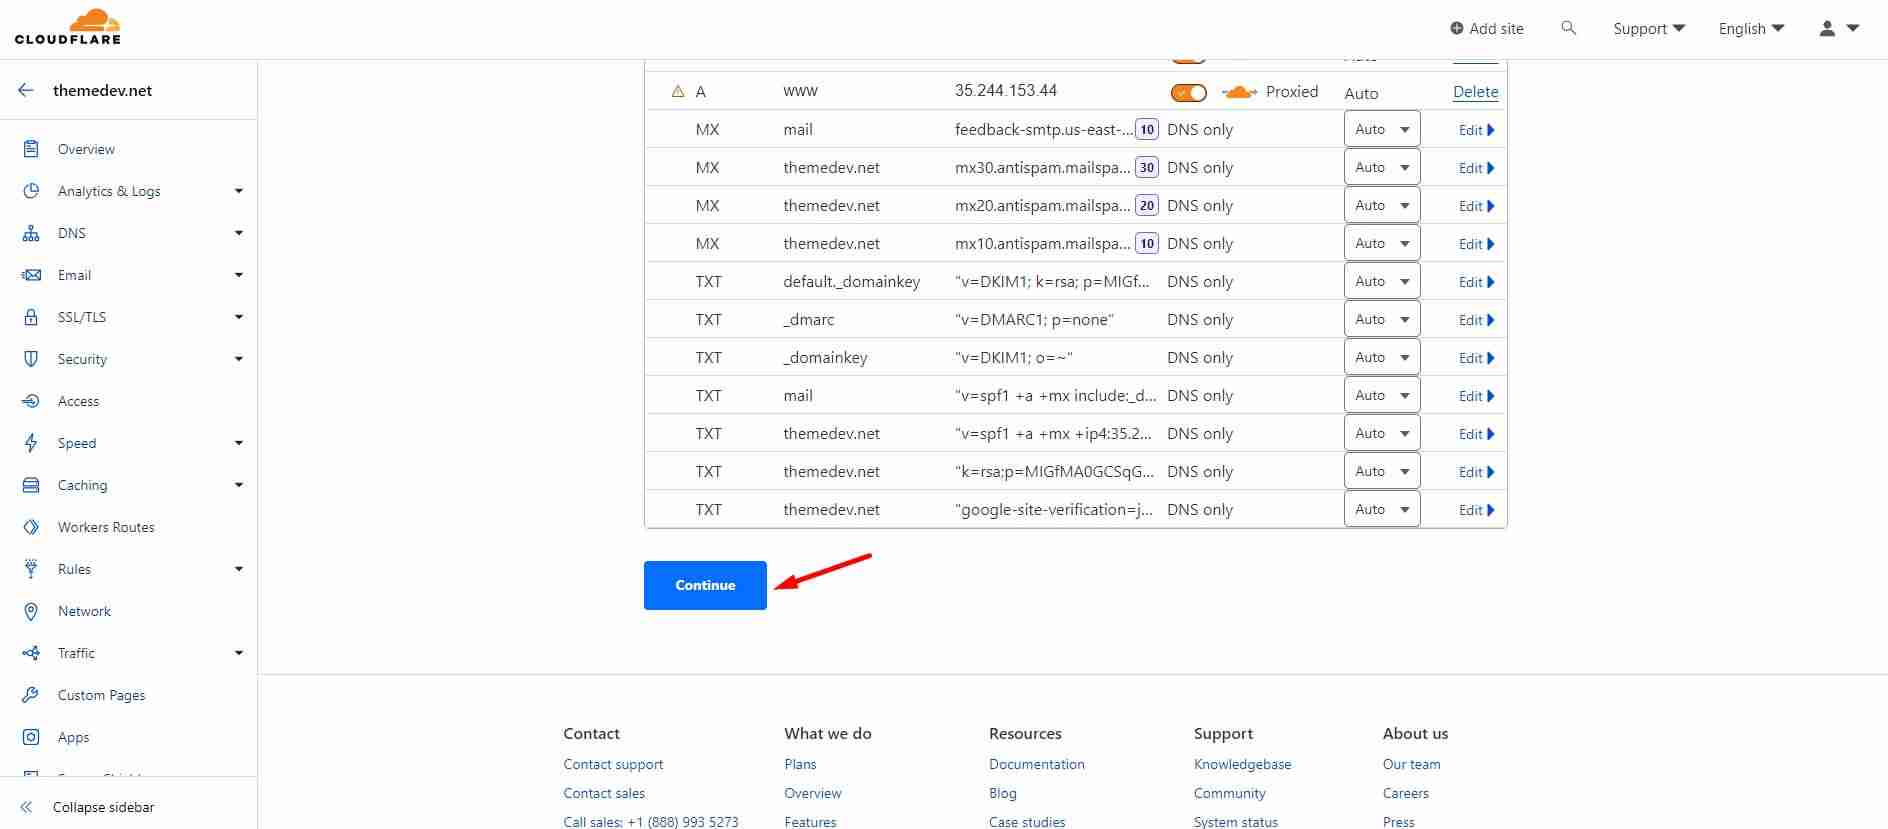
You can change your nameservers if needed.
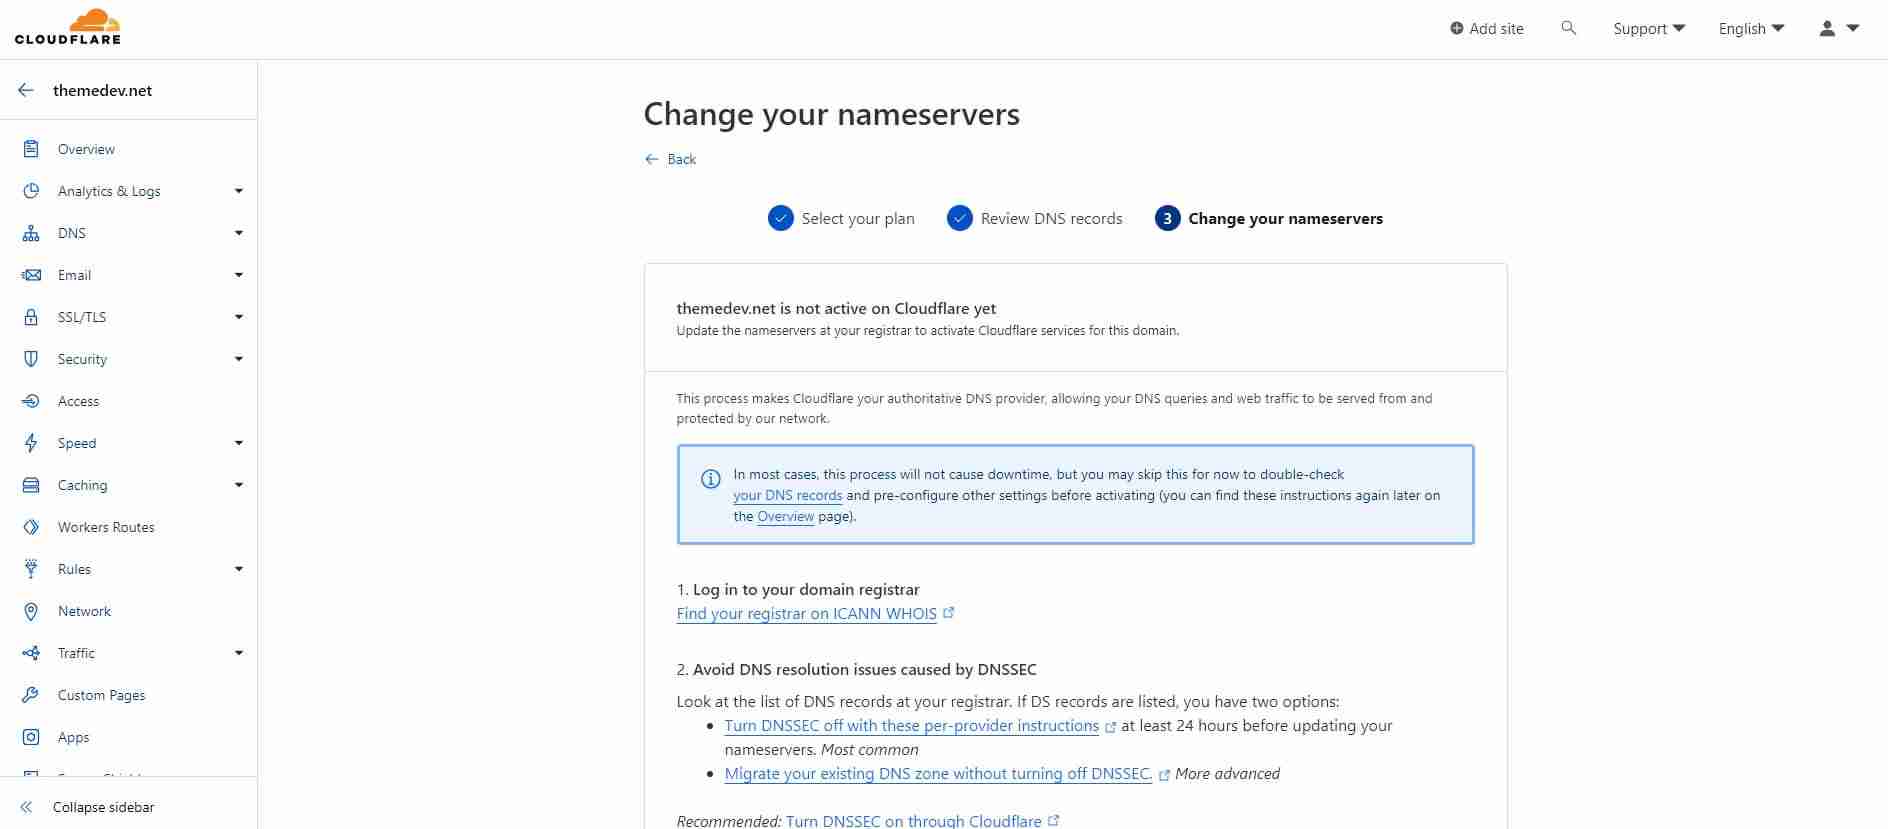
Now you can get started with Cloudflare R2.

Step #4: Create and Manage Credentials
To collect the API key and Secret Key go to the R2 tab and click on Create API Token.

Insert a token name and check the box of Admin Read & Write.

Now collect and save the Access Key ID, Secret Access Key, and Endpoints for S3 clients.

Step #5: Paste Credentials (Secret Key)
Go back to the WordPress dashboard, where you can find the Next3 setup.
In this second step of the Next3 setup process, you need to select S3 Object Storage from this provider’s section.

Enter your collected Access Key ID in this required field.

Similarly enter the collected Secret Access Key.

Also insert the collected endpoints as well.

After inserting all these credentials click on the Next button to continue.

Step #6: Connect with Bucket
Now you can see the portion where you need to create a bucket or connect with an existing bucket.

Here we’re choosing an existing bucket.

Now hit the Save Bucket Settings button.

After completing all of these above processes you can see your website has already been connected with S3 Object Storage (Cloudflare R2).

Step #7: Configure Storage Settings
Setting up all the fundamental features on Storage Settings is necessary after integrating Cloudflare R2 with WordPress.
You can go to the WordPress Admin Dashboard and select the Next3 Offload option to customize the basic storage settings.

From the Next3 Offload control panel, You need to select Storage Settings.

Now, you can enable Offload media and Copy to local server options using the toggle button.

After scrolling down a bit, you can also enable the options for Setup Path and File Management.
For example, Add prefix to bucket path, Add year & month to bucket path, Add object version to bucket path, Rename files, Offload format to the cloud, etc…

Step #8: Delivery Settings
Now it’s time to select a provider to deliver your offloaded files.
Go to the Delivery Settings.

Now, select a provider. You can also enable some basic functions from here as well.
After enabling the basic functions, click on the Save Settings button.

Step #9: Set Up The Offload Settings
Finally, you can set up the Offload Settings.

You can now offload your existing media files and individually offload the existing media files. Just click on the Offload Now button to complete the offloading process.
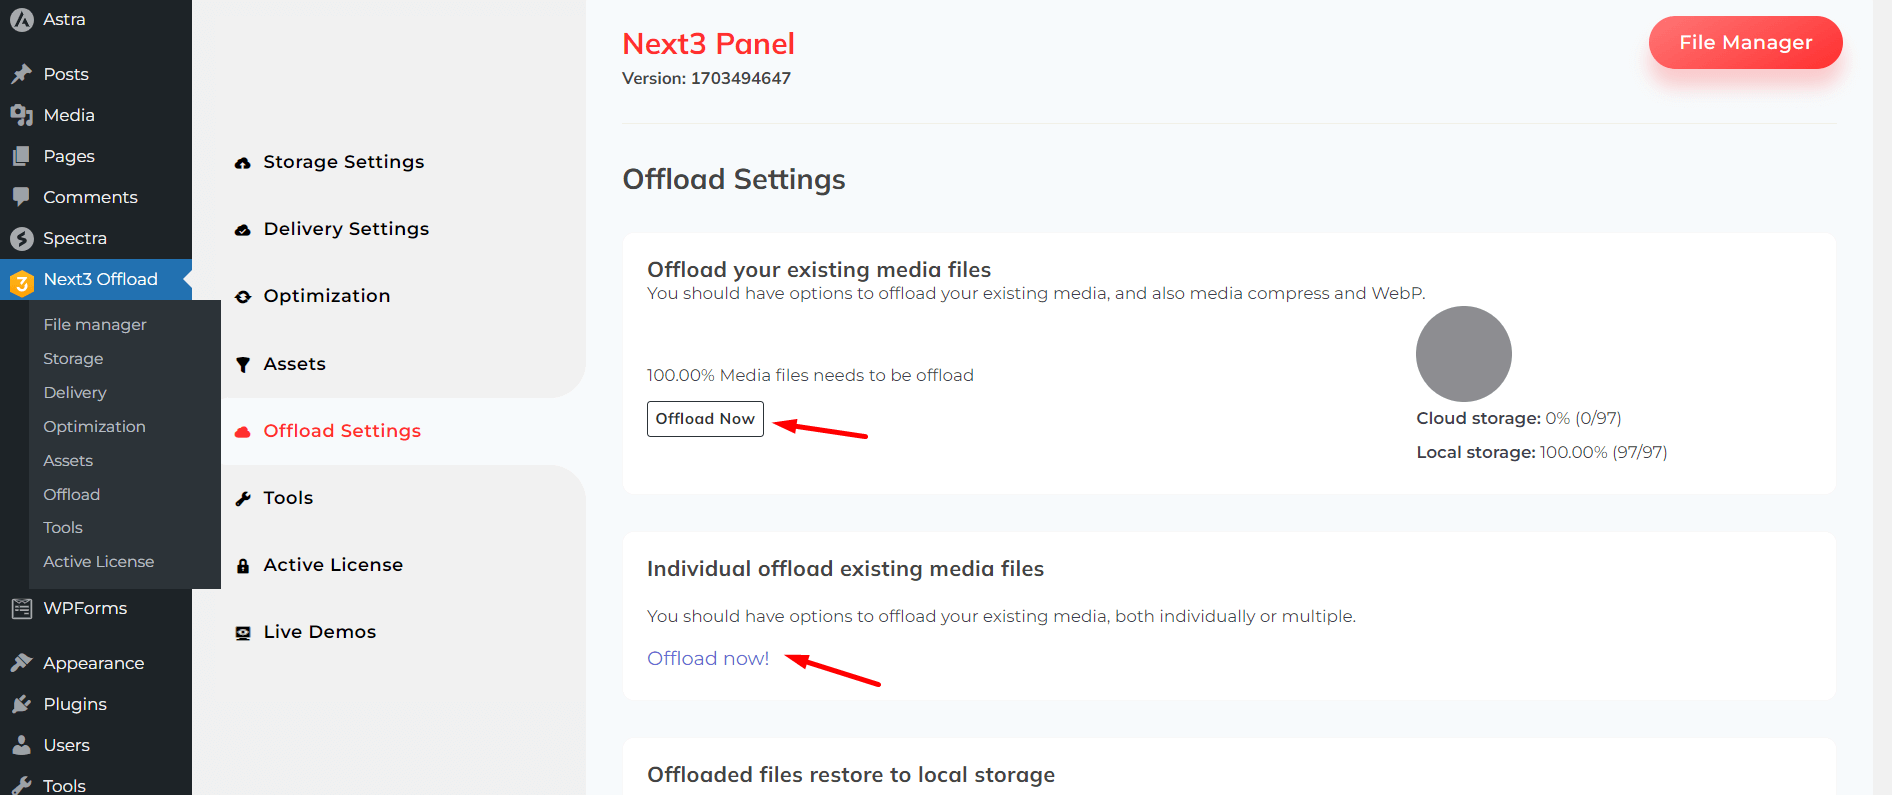
You can also access the features to restore offloaded files to local storage and clean up offloaded files from local storage.

You can both offload existing CSS and JS files to the Cloud.

That’s it! Your WordPress site is now integrated with Cloudflare R2, benefiting from improved performance, security, and reliability. Make sure to monitor your site’s performance and security settings regularly through the Cloudflare R2 dashboard to optimize its performance further.
Final Words
There are several benefits for you when you integrate Cloudflare R2 Cloud Storage to offload WordPress media assets. You may maximize the performance of your WordPress website, save storage expenses, and guarantee dependable data durability by taking advantage of Cloudflare R2 safe and scalable cloud storage.
Plugins such as Next3 Offload facilitate smooth integration, making the procedure easier to understand. It makes it simple for you to organize and transfer your media files to Cloudflare R2.
To develop a quick and optimized website, incorporate Cloudflare R2 and offload your WP media files by following the preceding instructions. A quick website will enable you to interact with an increasing number of users.
You may connect with us on Facebook and X. Also, check out our YouTube channel to view videos.